Wednesday, April 3, 2013

UFQs (Did not post when it was originally written)

I was busy the last couple weeks and moved three UFQs to topsville, finished piecing another quilt that was in progress, pieced backs for two quilts, and started on two other quilt tops.

I am sending two of the tops off to be quilted and when they return they will be bound and then travel to the recipients.

The first is a Blue and Yellow Friendship Star Quilt that I started for myself long ago.  I still need to piece the backing for this one.

The second was from a swap I did several years ago. I call it the Green and Burgundy Quilt. The backing is pieced and it is ready to go.

The third is from a swap I did years and years ago, where I sent out the focus fabric and asked that they use blues, and whites, with some green to make the blocks. I call it the Blue Hoffman Swap Quilt. I still need to piece the backing for this one.

The fourth is called .... and will be going to someone special when it is quilted and bound, so I am not posting a picture of it until I get a picture back of it with its recipient.  I finished the back for it and it is ready to go.

I am still working on finishing up things, especially my UFQs, but I am also working on new things that are gifts, including a couple of baby quilts and a quilt using the Pat Sloan pattern "Coins in the Fountain."  I have the strips pieced, but need to cut the sashing and the fabric strips that go between the pieced rows.  This one is a gift also.

Saturday, March 30, 2013

My Ruffled Purse is Done

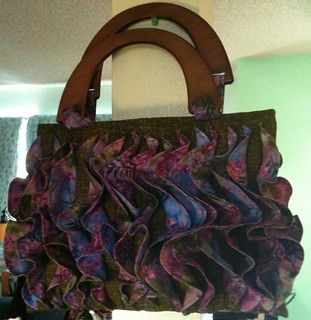
I finished my ruffles purse in class today. It came put very nice, though sewing around the wooden handles is not fun.


I really like how my pursed turned out and am very happy with it.  Next I plan to spray it with Scotch Guard to protect it, before using it.  I think it will be great fun to carry on trips and to use in the summer.

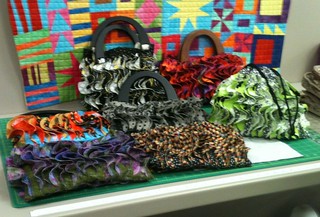
Here is a picture of all the purses which had at least the out side of the bags done.  Two of us totally completed our bags in class, everyone else was very close to finishing.

 The two bags on the far right are ones the instructor made.  I love the black and white with line green one.

I am making a second bag with a drawstring closure like the black, white, and lime green one as a gift.  I might make a third one and use these colors as the bags are not that hard to do.  

The worse part is the wooden handles as they get in the way when you are sewing the inside and outside of the purse together as you have to put them on first.  Though the bag is not a fast finish, it is not difficult to make.


Pumpkin Patch Quilter Contest

I entered to win this:
https://blogger.googleusercontent.com/img/b/R29vZ2xl/AVvXsEjIarnHEDafUEYgaNvtTQ-NVqHXQ2nX0DSWg1-9AbbYchae_fw5NLhuaZQReBWPFfp5euN17YRLxZwByucLQuxj1yE_3kcf8XBZEsl-JnRlKcSpGgYjcBRQ5raNSGzMDF3D11jusFQCRQ/s1600/DSCN1844-001.JPG
 at the Pumpkin Patch Quilter.  If you want a chance to win, you have to enter also.

Thursday, March 28, 2013

Quilt Delivery

Tonight I delivered a quilt to a very happy recipient. She love the surprise. Her little puppy wanted chew on it, and was told no.  The quilt was put up out of her reach.


I am hoping that the quilt will bring her warmth and comfort as she fights her battle against two cancers.  She is a strong woman and one who I consider a hero because she has been fighting this battle for several years.

I also just realized I never took a picture of the quilt after I finished the binding. 

Tuesday, March 26, 2013

Ruffled Purse in Progress

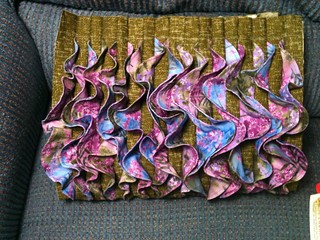
I started making this ruffled purse a little over a week ago.  I picked an Alaskan Fireweed fabric as my primary fabric for the ruffles with a green for the outside and a blue for the inside. Some people picked two different fabric to do their ruffles, one for each side, but my fabric is multicolored so my ruffles are all different.

First thing was to cut 64 squares roughly 6.25" square and then trace the ruffle template onto 32 of them and I was ready for my first class, last Saturday. 

In class we sewed on the outside edge of four ruffles, stacking the squares right sides together and then cut our ruffles out, flipped them to wrong sides together and pressed. Next was to top stitch. Once that was done we pressed the lightweight interfacing to our purse fabric and cut that into strips.  Next came the pinning stage and when I say pinning I mean lots, and lots, and lots, and lots of pinning. each ruffle had to be pinned to a strip, one on each end and sewn down.

When I came home on Saturday and Sunday, and today, since I subbed on Monday I continued sewing, cutting, pressing, top stitching and pinning.

Once you had to strips sewn with two ruffles on each you pinned two strips together with the ruffles all on the left.  So with 17 strips, 16 of which had 2 ruffles pinned to them, then sewn on you pinned and sewed them in to sets of two strips with ruffles on the left.

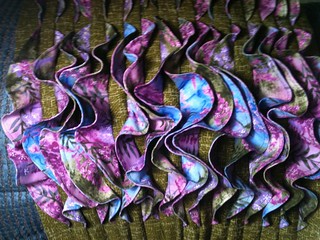
I love how the fabric I chose for the ruffles has so much color variety.
Once you had 8 sets of two strips with ruffles you pinned and sewed them into sets of 4 strips. Then pinned and sewed them into sets of 8 strips.

The bottom of the purse.


 Once again you pinned and sewed them together and added the last strip on the side with the ruffle on the outside.


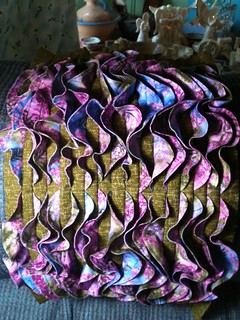
This is the point I am at now. Here is my purse ready for class on Saturday, where we will be making the lining and pockets, adding a magnetic snap, tabs and a wooden handle. I plan to cut out my lining so I am ready for class.

I love how my ruffles look.

In the interim I am going to start a second bag as a gift. I am hoping to have it to the same point by class on Saturday. Though I think I will use a draw string closure on this one, just so I can make sure I do it right while in class.